
The Importance of Properly Bedding in New Brake Pads and the Safe Step-by-Step Process to Follow After Replacement
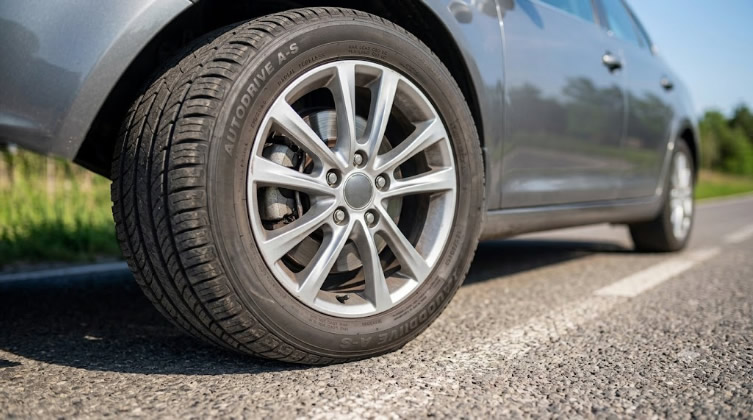
Replacing worn-out braking components is one of the most vital maintenance tasks any car owner can perform. There is a distinct sense of relief that comes with knowing your vehicle is equipped with fresh stopping power. However, many drivers make the common mistake of assuming that once the new parts are bolted on, the job is completely done. They drive straight out of the garage and immediately resume their normal driving habits, unaware that they are skipping a critical phase of the installation process. Without a proper bedding-in period, even the highest-quality components can suffer from reduced performance, annoying noises, and a significantly shortened lifespan.
A growing number of vehicle owners now prefer to manage their own vehicle maintenance to ensure safety and manage costs. For instance, acquiring brake pads at autodoc.co.uk allows drivers to obtain the replacement parts needed for their specific car model. However, even correctly fitting components cannot deliver their full stopping potential if the critical initial conditioning process is ignored. This conditioning, commonly known in the automotive industry as bedding in or burnishing, is the systematic process of mating the new pads to the brake discs through controlled heating and cooling cycles. Skipping this step can lead to a host of avoidable mechanical issues.
Understanding the Chemistry and Mechanics of New Brake Pads
To understand why new brakes require a break-in period, it helps to look at how these components are manufactured. Modern brake pads are composite blocks made from a blend of metals, ceramics, binding resins, and various friction modifiers. During the manufacturing process, these materials are compressed under immense pressure and heat, but they are not fully cured. The binding resins inside the pad remain somewhat volatile when the part is brand new. When you apply the brakes for the first first few times, the intense friction generates heat, which causes these resins to rise to the surface and escape as gas. This process is known as outgassing.
If you subject brand-new brakes to sudden, severe thermal stress by slamming on the pedal, these volatile gases cannot escape quickly enough. Instead, they form a highly pressurized cushion of gas between the pad and the disc, preventing proper contact. Even worse, the excessive heat can cause the raw resins to liquefy and quickly solidify on the surface of the pad, creating an ultra-hard, glassy glaze. Once a brake pad is glazed, its ability to grip the metal disc is permanently degraded, leading to a hard pedal feel, poor stopping power, and loud, persistent squealing that can usually only be solved by throwing the damaged pads away and starting over.
Proper bedding solves this chemical problem through a controlled, gradual thermal introduction. By heating the pads slowly, the resins cure evenly, and the volatile gases escape safely. At the same time, this process establishes what mechanics call the transfer layer. When pads and discs slide against each other under moderate pressure, a microscopically thin, uniform layer of the pad’s friction material is transferred onto the surface of the iron disc. Once this layer is established, the brakes operate on a friction-on-friction basis rather than pad-on-raw-metal. This matching of surfaces is what ensures whisper-quiet operation and incredibly consistent stopping power.
The Safety Implications of Skipping the Bedding Process
Operating a vehicle with unconditioned brakes is not just bad for your wallet; it is a serious road safety concern. Brake system performance is the single most critical factor in avoiding collisions, and even a slight delay in deceleration can have catastrophic results. According to a landmark study by the National Highway Traffic Safety Administration (NHTSA) in their National Motor Vehicle Crash Causation Survey, brake-related problems account for approximately 22 percent of all crashes assigned to vehicle component failure or degradation. A significant portion of these braking issues stems from improper maintenance, which includes the failure to properly seat and condition new components after a service.
When new pads are forced into immediate, aggressive service without being bedded, they fail to establish a uniform transfer layer on the brake disc. This lack of a matching contact surface can cause uneven braking forces, steering wheel pull, or an unexpected increase in emergency stopping distances. Because the pads only touch the high spots on the uneven metal surface of a new or resurfaced rotor, the actual contact patch is much smaller than designed. Under hard braking, these tiny high points experience extreme, localized temperatures. This extreme heat can warp the brake disc, creating thin and thick spots along its circumference. Within a few thousand miles, the driver will begin to feel a violent shaking in the steering wheel and brake pedal whenever they try to slow down, a condition known as brake judder that requires expensive replacement of the warped discs.
By taking the time to properly bed your brakes, you ensure that 100 percent of the pad’s surface area makes perfect contact with the disc. This distributes the friction and heat evenly across the entire assembly, eliminating localized hot spots and guaranteeing that your car will stop in the shortest possible distance when an emergency arises on the highway.
The Step-by-Step Bedding-In Algorithm
To perform a successful bedding-in procedure, you do not need any special mechanical tools, but you do need a safe environment where you can control your speed without disrupting other road users. The goal is to heat the brakes up gradually through a series of planned, moderate decelerations, and then let them cool down completely.
The following sequence outlines the precise algorithm you should follow immediately after leaving the workshop:
- Find a safe and secluded location: Look for a wide, flat, and empty stretch of road, such as an industrial park after hours or a quiet country road with no traffic behind you. It is absolutely vital that you can slow down repeatedly without risking a rear-end collision with another vehicle.
- Perform the initial low-speed cycles: Accelerate smoothly to 30 miles per hour. Apply the brakes with moderate, steady pressure to decelerate the vehicle down to roughly 5 miles per hour. Do not come to a complete stop, as keeping the pads pressed against a stationary, hot disc can leave an uneven deposit of material. Repeat this gentle cycle four to five times, allowing about 30 seconds of driving between each cycle to let the components breathe.
- Transition to the moderate-speed cycles: Once the brakes have warmed up slightly, increase your speed to 50 miles per hour. Apply firm, decisive pressure to the brake pedal to bring the car down to 10 miles per hour. You should feel the brakes biting more effectively with each repetition. Perform this higher-speed deceleration four to five times, again avoiding a complete stop at the end of each run.
- Initiate the crucial cooling run: After the final slowdown, immediately drive the vehicle at normal cruising speeds (around 40 to 50 miles per hour) for at least 10 to 15 minutes without touching the brake pedal. The air rushing through the wheel arches will act as a natural coolant, gradually bringing the temperatures of the discs and pads back down to normal operating levels.
- Park the vehicle and let the system cure: Once you have completed the cooling run, park the car on a flat surface and turn off the engine. Let the vehicle sit undisturbed for at least an hour to allow the heat to dissipate completely, cementing the newly formed transfer layer into the metal pores of the discs.
Visual and Tactile Indicators of a Successful Bedding-In Process
After completing the bedding-in runs and letting the vehicle cool down, you can perform a quick visual inspection to verify if the process was successful. Grab a flashlight and look closely through the spokes of your alloy wheels at the surface of the brake discs. If the bedding-in was done correctly, you should see a highly uniform, slightly dull, light-gray or blueish-tinted sweep across the entire area where the pad makes contact with the metal. There should be no bright, mirror-like polished sections, nor should there be any dark black splotches, which indicate localized overheating.
From the driver’s seat, you will also notice a distinct difference in how the car behaves. Brand-new, unbedded brakes often feel slightly numb or wooden, requiring a surprising amount of pedal effort to achieve moderate stopping power. As the bedding-in cycles progress, this wooden sensation will disappear. The pedal will feel firm, highly progressive, and responsive to the slightest change in foot pressure. If you experience a smooth, quiet, and predictable deceleration without any high-pitched squealing or pulling to one side, you can rest assured that your new pads and discs have mated perfectly and are ready for daily driving duties.
Critical Mistakes to Avoid During the First Two Hundred Miles
While the initial bedding-in algorithm takes only about 20 minutes to complete, the chemical curing process of the friction material continues over the first few hundred miles of normal driving. During this delicate break-in phase, the materials are still settling, and their structural integrity remains vulnerable to extreme physical and thermal stress.
To prevent ruining your new components prematurely, make sure to adhere to the following driving precautions:
- Avoid panic stops and emergency braking: Unless it is an absolute emergency to protect your safety, do not slam on the brakes or engage the anti-lock braking system (ABS) during the first 200 miles of travel.
- Do not hold the brake pedal down at stops: If you must come to a complete stop after a period of heavy deceleration, shift the car into neutral or park and release your foot from the brake pedal to prevent hot-spot material transfer.
- Avoid dragging the brakes on long descents: When driving down steep hills or mountain passes, do not keep a light, continuous pressure on the brake pedal. Instead, use engine braking by shifting into a lower gear, or use intermittent, firm braking followed by release cycles to let the rotors cool.
- Refrain from towing or carrying heavy loads: Keep the vehicle’s weight as low as possible during the initial break-in period to minimize the kinetic energy that the new brakes must convert into heat.
- Avoid washing the car immediately after driving: Spraying cold water from a hose directly onto hot brake discs can cause instant thermal shock, warping the metal and leading to permanent vibrations.
Transitioning to Normal Driving and Ensuring Long-Term Brake Health
Once you have successfully navigated the first two hundred miles with your new brake pads, they will have reached their peak structural stability and maximum friction coefficient. From this point forward, you can drive with complete confidence, knowing that your braking system is fully prepared to handle the most demanding emergency situations. However, maintaining that exceptional level of performance over the lifespan of your vehicle requires ongoing attention to your driving habits.
Decelerating smoothly, anticipating traffic flow, and avoiding unnecessary tailgating are the most effective ways to prolong the life of both your pads and your discs. By giving yourself plenty of space to slow down gradually, you minimize the thermal stress placed on the friction materials, preventing them from overheating and keeping the transfer layer intact. Regularly inspecting the thickness of your pads through the wheels and flushing your brake fluid every two years will ensure that your vehicle remains a benchmark of road safety, delivering quiet, powerful, and reliable stopping performance for tens of thousands of miles to come.